You can easily manage and restore your MySQL databases online using the phpMyAdmin tool, which is fully integrated into your WebHost4Life Control Panel. This tool allows you to access, export, and import databases quickly and securely.
To access phpMyAdmin:
- Go to Databases > MySQL Databases in your Control Panel.
- Locate your database in the list and click on the phpMyAdmin icon next to it.
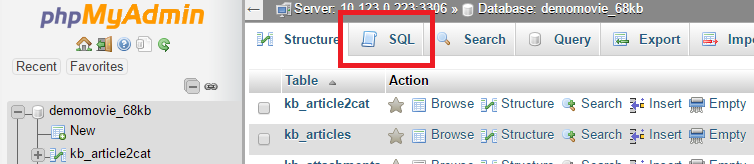
A new window will open with the phpMyAdmin home screen. In the left-hand frame, click on your database name to select it.
In the top-right frame, you will see several icons. Click on the SQL icon (the second one) to open the query window.
To import your database backup (dump file):
- Click on the Import Files tab in the query window.
- Press the Choose… button and select the backup file from your local computer.
- Click Go to start importing the database.
Important: Using this method, you can import dump files up to 20MB in size. For larger files:
- Upload the file to your WebHost4Life hosting account via FTP (see our guide: How to Connect via FTP and Upload or Download Files on WebHost4Life).
- Submit a support ticket in your WebHost4Life Control Panel, and our technicians will assist you with importing the file.
With WebHost4Life hosting, restoring MySQL databases is simple, secure, and reliable. Our hosting services provide full MySQL support, high-performance servers, and expert technical assistance to ensure your website and applications run smoothly. Try WebHost4Life cloud hosting today and experience hassle-free database management for your site!
Pingback: How to Access and Edit Your MySQL Database Online with phpMyAdmin | WebHost4Life